Rim cleaning

Brothers of Briar

Help Support Brothers of Briar:

This site may earn a commission from merchant affiliate links, including eBay, Amazon, and others.

Hobo Hoot

Active member
Joined
Mar 3, 2013
Messages
28
Reaction score
0
Why oh why do eBay sellers continue to sand the rims of pipes? I find this practice to be immeasurably intolerable and regularly fire off irate emails to these people. I guess that makes me a serial pest, but as a Friend of Briar I feel it is my duty to inform these people of proper cleaning technique. If in doubt, I always say, let the buyer do it themselves then and only then will they be happy! Perhaps if more of us bombard them they will get the point. But seriously, many of them are quite nice about it and do in fact take advice well.

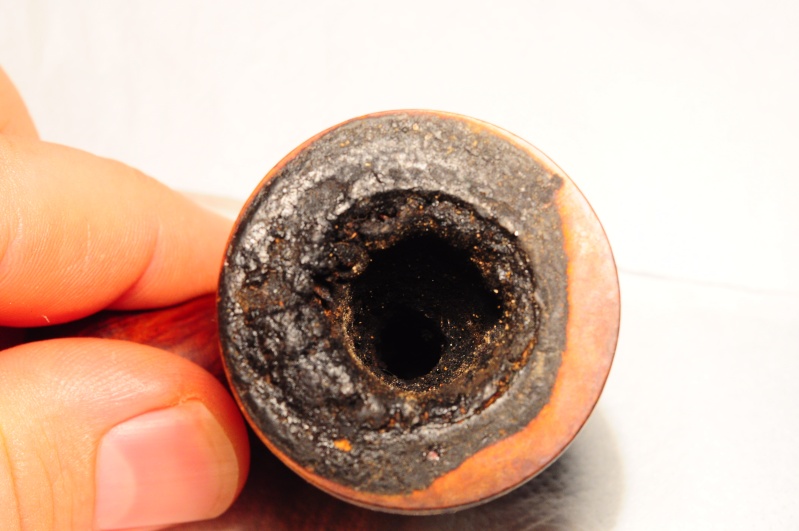
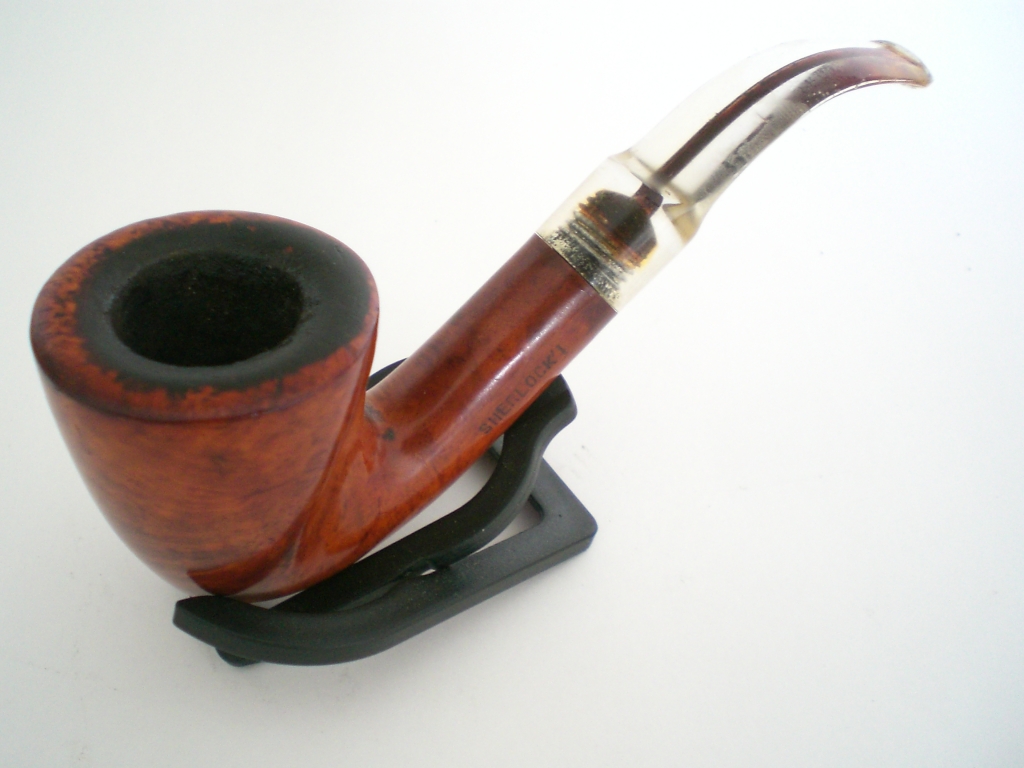
Below is a before-and-after of a recently revamped pipe. It started life as a stummel in a box of pipes I got from Germany. If you're interested in the full story (and want to see the finished pipe) you can see it on the hobo Pipe's blog at: hobopipes.blogspot.com.au/2013_02_23_archive.html

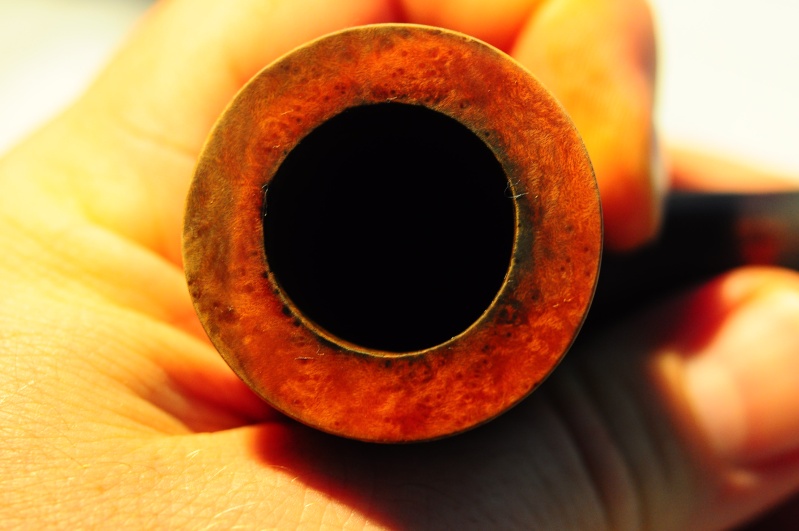
All that was used was some very slightly soapy warm water and a cotton tea-towel. There is still some deeper gunk in the second picture, but after a quick bout with the buffing machine it came up spotless!
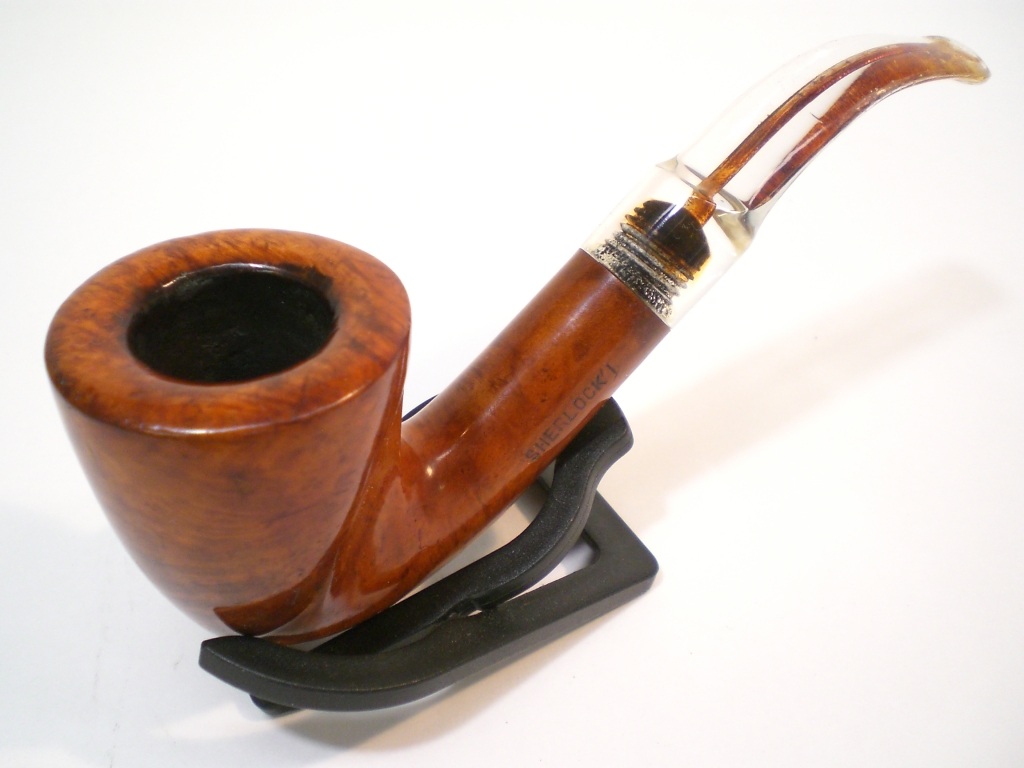
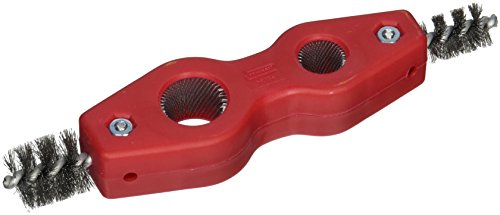


But a belt sander is sooooooo much quicker. :lol:

:lol!:


Seriously: Nice job. It doesn't take a sander, but many Ebay sellers are just in it for a quick buck and a quick sale...
 
I feel you're quite right to a point, if there is nothing more than gunk on the rim then the pipe should be going absolutely no where near sand paper or any other abrasive, but if there is severe scorching damage or brutal chipping then topping the bowl is the only way forward.
 
Rob_In_MO":pbgmd836 said:
But a belt sander is sooooooo much quicker. :lol:

:lol!:


Seriously: Nice job. It doesn't take a sander, but many Ebay sellers are just in it for a quick buck and a quick sale...
Unless they are an established estate seller, THIS is as Rob says and is what is done to get a quick turn-around for these sellers. I wouldn't buy from one for just this reason. :twisted:
 
...so I didn't have to have to saw off a quarter of an inch of bowl from this estate, high-en Dunhill just to get that stuff off? Oops. I'll list it as a "custom" and be done with it. :mrgreen:

8)
 
@ kirk, I agree absolutely that there is a huge difference between gunk and charring. Exhausting all non-destructive processes is always the first step with any form of tinkering, pipe or otherwise! Below is the cut-and-paste response I send to eBay sellers when they ask about cleaning rims.


---------------------------------------------
As for the rims, they are a problem that no-one has ever really found the complete answer to, which is no surprise as you already know how 'dependent' all pipe restorations are on the smoking habits of the previous owner! As I'm sure you already know, pipe stains (on the rim/exterior) are alcohol based - so using alcohol to dissolve the gunk on top is not feasible unless you are completely refinishing the pipe. I've only ever done this to two pipes, both because the original patina had already been destroyed in large patches on the rest of the pipe by some corrosive element. Both pipes were gold-band Peterson's and as such were worth the time, money and effort. But I digress.

The first step is to decide how the rim has been fouled. There are only three options:
- Charred (burnt by either tobacco or more commonly by the smoker regularly using a pipe lighter instead of matches)
- Gunked (pipe smoked at an angle or very slowly allowing smoke to contact the rim which has left behind a layer of residue)
- Charred and gunked (combination of both - obviously! - but far more common in straight shank/bit pipes as these tend to be smoked on a slight angle and to have poor visibility when lighting so people miss the tobacco and get the rim.)

To determine how it has been fouled start by assuming it is just gunked. Take a nice bit of cotton and wet it, then start lightly rubbing it around the rim. Some people just use water for this, some use water with a tiny bit of cleaner (like Simple Green) in it and some use saliva. I'm a believer of saliva as I tend to think that the enzymes in our saliva help in breaking down the gunk. But there is no proof of this nor indeed for any of the other approaches. At this stage some of the gunk will have been removed. If you are still making good progress then the rim may just be gunked, but if there are hard and crusty deposits that are not softening then the pipe is either charred or charred and gunked. Either way keep working away with the cotton cloth and whatever you are wetting it with until there is not much more point. Don't be tempted to scratch at any little bits that don't come of as if it is charred keeping a uniform char is important for appearances.

In the case of charred there are only two courses of action. Either use an abrasive to take some of the charring off, or leave it alone. Charring is an accepted part of estate pipes and no value will be lost by leaving charring on. If the charring is so bad as to have deformed the top of the pipe (common among Peterson's pipes for example) then you will need to take back the top to fresh wood. Before you do this take note of the original profile as much as possible (or go to reference material to find out). Was it flat, crowned, inner beveled, outer beveled etc. When the profile is sanded in you will then need to slightly round all edges (sharp edges on an old pipe always look wrong). It is also advisable to remove a slight amount of patina from the outside edge of the top of the bowl where it meets the rim. This will give you a mixing zone in which the stain (applied next) can 'bleed' into the existing pipe color. But this is a matter of personal preference/trial and error. The final step is to apply new stain. Getting true alcohol based stains is important. There are a few sources for these but pipe stain and shoe stain (leather stain) are the most commonly used. With older pipes leather stains in my experience tend to look better. This is all a lot of work though so the pipe needs to be really special for this to be economically feasible. Obviously the darker the pipe the easier it is to blend in a new stain!

The final step is polishing. This is actually one of the most important steps as you will be trying to match the texture of old and new wood areas. high-gloss and semi-matt are the most often used. You'll be amazed at the difference that matching textures makes. A gloss finish will make more sense on lighter pipes and on pipes where the nomenclature is strong/easily read. Semi-matt will make more sense when the nomenclature is weak/indistinct as you will not want to remove as much material. As long as you have rubbed down the rest of the pipe with a wet cotton rag, then all that should be required for polishing is some pure carnauba wax. If you are not getting a high shine then your polishing machine/device may be running at too high an rpm. 500-1000 rpm is ideal, but in reality anything up to about 1500-1700 will work ok.

The only variant on all of this is for freehand pipes with a rim that is burl/textured. In this case use a soft and slightly moist toothbrush to lightly scrub the irregular rim, then dab dry with a rag. Try to 'flick' the gunk towards the outside edges as this makes it easier to see how much progress you are making.

Note that at no point are any abrasives used on the outside of a pipe (except in the case of a heavily charred and deformed rim). The only time you would do this is when a pipe is being completely refinished.

Whilst I'm certain you already knew much of this I do hope that something in all of that was helpful. I thank you for your openness and invite you to contact me at any point if you want to discuss anything pipe related.
-----------------------------------------------------------------

If anyone disagrees with any of this please say so! I am, like all pipeologists I suspect, a lifelong and keen learner.
 
I'd only add that, provided the original finish is still intact, and the hand grease + dirt accumulated over the years has been carefully removed, it will not likely "need" re-waxed. That dull, old finish that remains will come back around again simply by rubbing it with a soft flannel shirt tail after you've smoked it each time. Very slowly, but it will come back.

Sure, people (and apes) like things that are shiny. But an old pipe with a high-gloss finish just looks boogered-with, IMHO.

:face:
 
Yak":m6skislt said:
Sure, people (and apes) like things that are shiny. But an old pipe with a high-gloss finish just looks boogered-with, IMHO.
This! It's one thing to get an old pipe and polish it up, but keeping an old briar patent-leather makes it look too "whored up" for something that's been around the block (and deserves its patina). I know a guy that goes to great lengths to keep his meerschaum as white as the day he bought it, going so far as to bleaching it somehow--:scratch:--not my pipe, fighting a losing battle like that. :lol:

Take care of 'em, but leave 'em be? *shrug* I dig the personality that an old estate has, and I like helping be a part of the stripes new one earns in my hand with each smoke. Good stuff.

8)
 
I agree completely with all above comments re. keeping original patina. Keep in mind though that the blurb I posted above is aimed at eBay sellers that are trying to maximize profits; I'm trying to minimize the damage they do to pipes!

Getting them to stop polishing up their pipes just won't happen. Getting them to stop sanding patina to oblivion does happen! I've got about 25 sellers who now contact me regularly for pipe valuations and advice. Some of them are now selling pipes 'as found' and are happy with the prices they get. Others refuse to do this and insist on 'cleaning' everything. Each time they email me I attempt to shift them away from fiddling with the pipes and towards letting the buyer do it themselves. I also skill them up with regard to their photography (another hobby of mine) and try to get them to understand that providing clear and well lit photographs of stampings, combined with clear photographs from at least both sides and top and bottom, will bring them far higher sale prices on average than 'tarting up' the pipe.

Finally, getting them to realize that most of what they 'find' at garage sales is not high-end, is not 'rare' and is not worth $100 is a battle in and of itself. But after a few pipes have sold for my estimates they generally accept this truth. I had one guy email me several times, he was overly irate that his Kiko pipes had sold for only a few dollars. I explained that they were always a low-end pipe, and that being badly smoked for 20 years had not done anything to improve their value! Doesn't matter how much lipstick you put on a pig, it's still a pig. If you live with and care for that pig for 20 years then it is more than a pig to you, it may even be a companion. But put the pig on eBay and it becomes just a pig again in an instant.
 
I serendipitiously found this EZ method of cleaning up pipe rims --

You need a paper towel or scrap of cotton cloth, a saucer or shallow ash tray, a little water, and some mild soap (shampoo or, maybe better, some good ol' Barbasol)

Place the paper towel or cotton scrap on the saucer and put just enough water on it to moisten it. Wet the rim of the pipe with your fingertip, then put a wee bit of soap on the dampened cloth and around the stained pipe rim. (Just the rim, and less is better, since you can repeat the process if needed).

Then balance the pipe upside down on its rim on the dampened, soaped spot of the paper towel. You may need to place something under the pipe's mouthpiece to balance the pipe while it's upside down.

Then pet the dog or something.

Return in thirty minutes or so and use the dampened paper towel to rub the partially dissolved stain from the pipe's rim. Eyeball it to see it you're satisfied with the results or not. Repeat if needed. Once you're satisfied, take a bit of wax to the bowl and rim.

Remember, you only need a little bit of water and soap. You don't want to be so aggressive that you're damaging the pipe's finish.

Good luck.
 
Nice work! I agree and always strive to keep the factory finish when possible, removing that patina changes the pipe too much and I avoid it like the plague. I don't mine a little character in an older pipe. It is surprising how easily tars can be removed, often revealing unblemished briar.

Here is one I reburbed, a "Sherlock" brand pipe restored for a friend

sherlock_dave_ward_before.jpg

sherlock_dave_ward_finished.jpg


The gentleman who owned the Sherlock gifted me this GBD 9676 Colossus Seventy-Six, a super rare model I've not seen since. The rim still has some patina, but it would have been a shame to do any more and I would have lost all of the very faint nomenclature.


Great job on both mate, can we get more photo's of that GBD? It looks like an absolute cracker of a shape!
 
Hobo Hoot":016jhm3a said:
Great job on both mate, can we get more photo's of that GBD? It looks like an absolute cracker of a shape!
I thought that I posted that restoration here, but apparently not and all of my old Webshots photos are gone. I don't want to hijack your thread, so I'll start on on this unusual pipe. Thanks for the interest.
 
KevinM":gqtabe1x said:
I serendipitiously found this EZ method of cleaning up pipe rims --

You need a paper towel or scrap of cotton cloth, a saucer or shallow ash tray, a little water, and some mild soap (shampoo or, maybe better, some good ol' Barbasol)

Place the paper towel or cotton scrap on the saucer and put just enough water on it to moisten it. Wet the rim of the pipe with your fingertip, then put a wee bit of soap on the dampened cloth and around the stained pipe rim. (Just the rim, and less is better, since you can repeat the process if needed).

Then balance the pipe upside down on its rim on the dampened, soaped spot of the paper towel. You may need to place something under the pipe's mouthpiece to balance the pipe while it's upside down.

Then pet the dog or something.

Return in thirty minutes or so and use the dampened paper towel to rub the partially dissolved stain from the pipe's rim. Eyeball it to see it you're satisfied with the results or not. Repeat if needed. Once you're satisfied, take a bit of wax to the bowl and rim.

Remember, you only need a little bit of water and soap. You don't want to be so aggressive that you're damaging the pipe's finish.

Good luck.
Great tip!! Just used this on two Kaywoodies from the 30's and worked like a champ. Saved me quite a bit of time. Thanks!!
 
Great tip!! Just used this on two Kaywoodies from the 30's and worked like a champ. Saved me quite a bit of time. Thanks!!

Glad to help. I found that the familiar saliva + cloth + rubrubrub approach wasn't 100 percent effective and often was too aggressive. My approach is so quick and easy that, sometimes, when I remove the pipe from the dampened paper towel, the perfect circle of "burnt stuff" from the pipe rim just stays behind on the towel.

The other evening I decided my 30-year-old Wilke billiard needed maintenance. I did the rim treatment, sandpapered the cake back to ideal thickness, polished the stem and applied a little wax with my fingers. It now has that "burnished by use" look that I prefer. And total ETA was approx 15 minutes.
 
Looks like we have a winner in the rim cleaning stakes. I'll give it a go later today. BUUUUUUUUTTTT...PHOTO's! Cmon people you're killin' me here :) I want to live vicariously and see your clean-up jobs.
 

Latest posts

Top